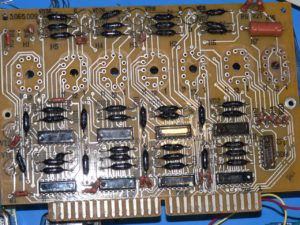
I had been thinking about doing a little project with nixies for a long time, but hadn’t really gotten around to it. They have a great old-school (old-fart?) vibe, and I found an old board on eBay with 7 nixies on it for cheap and decided that was a good place to start. It arrived (from Belarus), and I quickly realized how much faster this would go with a proper vacuum desolder tool, rather than just a sucker and some wick. Anyway, after much futzing around, I managed to get the little tubes off the board in prep for the next step. There are still some high voltage drivers left on that board I wouldn’t mind scavenging, but the board has a coating, and those intial 7 tubes just about killed me.
Nixies need 170V or so, and I didn’t much fancy the idea of rolling my own high-voltage power supply, so a quick check of the interwebs and sure enough there are a ton of them on places like eBay and Tindie. However, one that caught my attention as a better solution was a guy down in the states with a website tayloredge.com. Not only did he have some nice inexpensive (and tiny) power supplies, they also sell a very very nifty I2C nixie driver board. I had originally thought I might build a two digit module with the shift registers and drivers and sell it on Tindie myself, but wow, this is much better supporting direct addressing, shift modes, clock modes and even dimming. The density is crazy, with tiny SMD high voltage drivers, and a PIC controlling it all.
Like all good projects, all this stuff arrived months ago, and sat on my desk while I goofed off and did other things (Oscilloscope episode, coming soon !), and finally this weekend I decided to hook some of it up. First task was to make a mounting board that held four nixie modules (I only have two right now – I need to order more), so I cut up some advanced-vero-substitute (which really brings back old memories of Vero offcuts @ Greenweld), and build that into a mount that holds four digits, and strings together the necessary power (170, 5, GND) and I2C (SDA, SCL) lines.
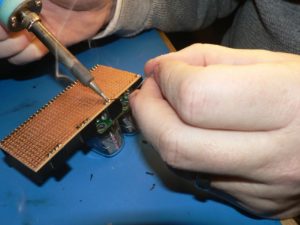
 A little cutting, filing, and some 0.1″ headers soldered to the board and it works out pretty well. Eventually I want two boards of four, but for now I’ll get the first one hooked up, and then spend some time playing with the I2C interface. I tried really hard to get some action shots of the soldering but that’s pretty hard without an assistant, luckily Mrs Boffin was close at hand, so I did manage to capture at least one action shot.
In the end I decided to also add a couple of 0.1μF capacitors as well on the 5 volt rail, but it all went together fairly well, all I need to do now is repeat it on the second board. It really is nice to have a stock of things like the 0.1″ headers and caps, which I buy cheap in bulk from China/AliExpress.
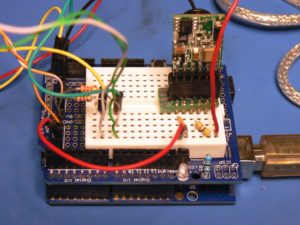
I had already tested out the power supply just on a bare nixie tube, and had learned that you needed a 47k voltage setting resistor as well as an enable jumper, so it was simple to put the power supply module on a little Arduino shield, along with the I2C pullups, and then I can just use that as a test jig. Amazingly the PSU works great from 5 volts with enough oomph to drive a couple of tubes, although I suspect in the final circuit with eight nixies, I’ll probably need to run the PSU from 9-12V.
Now the simple part, right? A little Arduino sketch that outputs the data to the tubes. Of course by this time it’s 11pm, and while it seemed straight forward from the Wire library in Arduino-land that this should be simple, things rarely are.

After everything was hooked up and on the board I was having all sorts of problems. Hey! This should be easy, set the address, send a register value, send a digit value. Not so fast bucko. First I managed to bend a pin on the bottom of the shield that connects it to the Arduino. Did I bend just any pin? No… I bent the ground pin, on the far side, bent into the middle, so it was impossible to see until I finally flipped the shield upside down, followed by a facepalm moment. Still with all of that working again, I could see that there was I2C data being sent, but nothing was showing up on the digits.
This should send a 5 to the first module:
Wire.beginTransmission(0x10);
Wire.write(0); // register
Wire.write(5); // value
Wire.endTransmission();
Nope, still no output on the tubes. After much head scratching, (and a 2nd glass of ginger beer), I decided it was time to dig out something that could actually decode what was going on on the I2C bus. So in to the tool chest and out with the Analog Discovery USB oscilloscope I bought a couple of years back. I had picked this up off Kijiji from a student at USask that didn’t grasp the concept that the $100 student price he paid for it was WAAAY less than the $275 street price for us normal people. I see two or three every year going cheap this way. Anyway, it’s a fine tool, and while the bandwidth isn’t going to win any awards, it has built-in I2C decoding on the 16 channel logic analyzer. Hey, what’s all that extra traffic happening? I didn’t put that there. Turns out it the module was set in clock mode (as opposed to address mode). WTF ? The answer is that when they say “0 0 0 0” for the DIP switches, they really mean “ON ON ON ON” because they’re shorting to ground on pulled high inputs. OK, now we’re cookin’ with gas. Set it up to the self test setting, voila! It’s counting from 0-9. Set it back to the 1st address (0x10), but still my simple sketch isn’t doing the business, why not ? I’ve set it to the correct address, I now understand the switch settings, why? why? Well after playing with the sketch for different addresses, I discovered that when they say address 0x10 in the docs, they really mean half of that (I2C addresses are 7 bits and they were counting from the MSB apparently), Changing the address from 0x10 to 0x08 and it’s working YAY!
 Once I got everything working, you can see clearly that the I2C address (at least from the Analog Discovery/Waveforms software) the address is and should be 0x08, not 0x10 for the 1st address. Easy fix in the code, and now I’ve got this sucker counting from 00-99 under my control.
Well, that was a weekend of 60 second fixes taking hours to find. Anyway, the first couple of digits are working, now to get 6 more modules (I’ve already got the nixies), and the 2nd carrier board built and we can move onto the next stage of the project.

