So many things going on, and I’ve been very bad not writing anything in the blog; so here’s a little update on something I’ve started. I picked up one of those inexpensive ATMega-based component testers off AliExpress. It’s a really really neat idea, and works remarkably well for something that’s only $12. Drop in a component and out pops value(s), pinouts etc.

There’s a huge thread on eevblog about them, and Dave even did a video of a another variant, so it was time to play around. This version I picked up has a a bunch of other options such as a basic frequency generator, but I was really just interested in the basic component identification, and a simple LCR meter.
Of course the first thing I wanted to do was fiddle with the software, and actually getting a toolchain that will compile it is a bit of a pain. The code in the git repository that I found wanted a copy of make, but I do my day to day fiddling on a Windows box, so the first problem was trying to find a copy of make for Windows. Turns out that a company called Equation have a compiled version of GNU Make that seems to work better than the one from GNU itself, so I downloaded that as a starting point. Then you need to get the avr compiler for Windows; but isn’t that already present with the Arduino toolchain? The answer is yes, turns out all you really need to do is add:
C:\Program Files (x86)\Arduino\hardware\tools\avr\bin
to your path. Picking all of the various options for my specific version (type of display, encoder etc) was a some reverse engineering, and trial and error, but I’ve succeeded in being able to reprogram an ATMEGA328 (and not the P version, because I was stupid on my last Digikey order) to burn the firmware. At least I have a starting point.
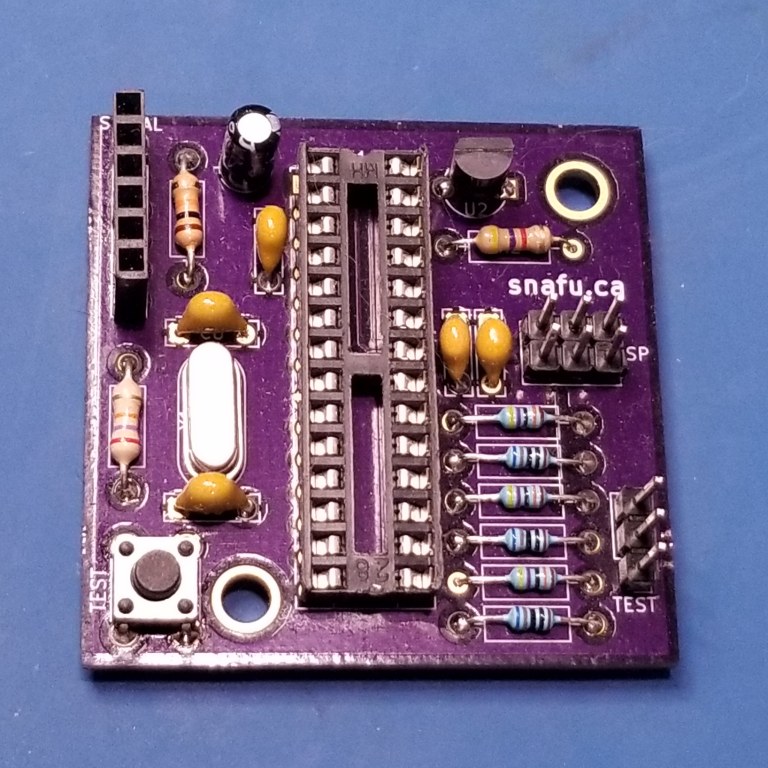
But what I really thought might be fun would be to make a standalone one that could spit data back to my PC, so I hunted online for one of the many circuit diagrams for these testers, and then composed my own version, that speaks serial (I know, how old fashioned). A little work in KiCAD and then fire off the result to OSHPark for some boards (I do love OSHPark). The result is this. I still have a long way to go, because a busy Christmas period has really put this on hold, but I hope to get back to this project really soon.
Over the next month or two (or likely 4) I’m going to try and hack the hardware into having a ‘serial’ display. From my gaze at the one major variant of the code, different displays are handled as separate modules, so I’ll probably have it just output keyvalue pairs, or something like that.